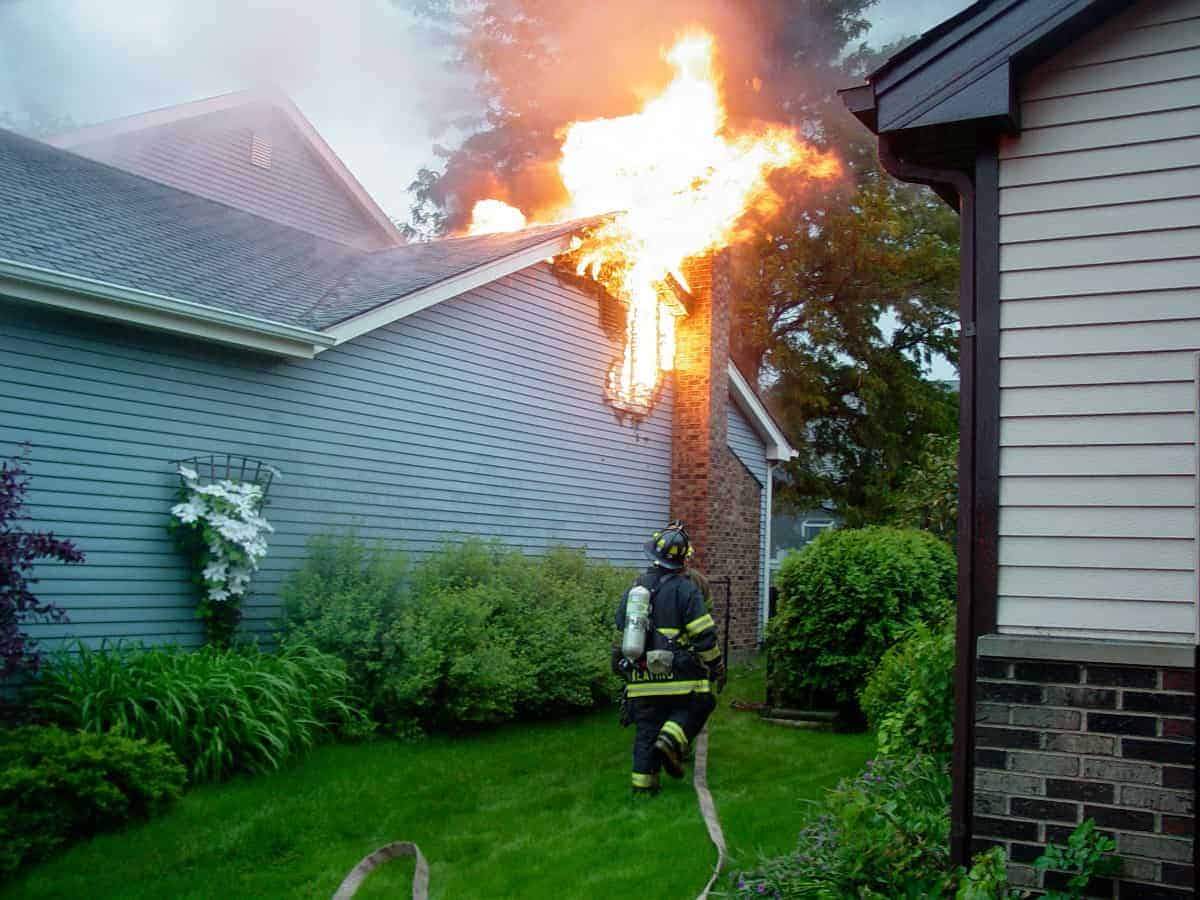
Going through the aftermath of a fire in your home is a daunting and emotional process. It’s crucial that you ensure the building is safe, find and document all damage, clean and repair what you can and to know when to call in professional assistance. But with so much on your to-do list — not to mention the array of emotions you’re undoubtedly going through — it can be overwhelming to get started, but that’s how this guide can help.
This guide will cover everything you need to know about the recovery process, whether it was a standard house fire or a wildfire that took over your area. The road may not be easy, but with the right knowledge, tools, and professional assistance, you can reclaim your sense of home.
Exterior Clean-Up
You’ll want to keep in close contact with your insurance company throughout the recovery process, but it’s especially important during the first few days. Go over the value of your home and property, and establish how your agent wants you to keep and send records of damages and repairs. If any of your copies of policy information were lost in the fire, request replacements as soon as possible; if you aren’t able to return home yet, you may be able to have it sent via email or to a trusted loved one’s address. Your agent should also be able to provide you with a list of qualified, trusted recovery professionals covered under your policy.
Be sure to check with the fire marshal that your home has been cleared as safe to re-enter, and note any rooms or areas to avoid before starting your damage assessment. If you’ve gotten approval, head over with a camera, note-taking materials, and plenty of safety gear:
- Long-sleeved shirts
- Pants
- Close-toed shoes
- Work gloves
- Safety glasses or goggles
- Face masks: ideally with two straps for proper sealing and marked with NIOSH, N95, or P100
- Hard hats
It’s a good idea to take the kids to stay with a family member for the first visit following the fire; aside from the unknown dangers, it can be extremely traumatic for a child to see his or her home in shambles. You may be able to recruit their help once you can prepare them for exactly what they’re about to encounter — and at a time you’ll be in more control of your emotions — but wait until you can assign him or her specific, safe tasks to focus on.
Start by examining the exterior structure of the building. The fire department may have used colored tape to mark off damage, so be especially cautious in these areas. Look along the foundation for cracks, and keep an eye out for potential damage to your gas line. If you have a porch, don’t step onto it until you’ve inspected all supports and overhangs and have confirmed they’re in good working order.
If your area was affected by a wildfire that was put out using chemical retardants (often identifiable by a reddish color), check your exterior walls and surfaces for any residual substances and wash it off as quickly as possible. Though you may be tempted to power wash the chemicals away, this can actually drive the stain further into surfaces, especially wood. Instead, dampen the area with water and scrub it with a wet, stiff-bristled brush dipped in borax. Wear gloves and a mask while cleaning, and wash with warm water and gentle soap if your skin makes contact. Be mindful of any puddles that may be attractive to a pet or other wildlife and do your best to keep water runoff to a minimum by employing sand, soil, and other absorbent materials.
Sometimes when a Class A Foam product is used to extinguish a fire, the foam will “bake” onto windows and other exterior surfaces. Because these kinds of products are similar to dish detergent, they’re relatively easy to clean up and may only require some scraping with a paint scraper; tile cleaner is usually enough to get any stubborn remnants.
You’ll want to be on the lookout for ash, especially if the damage to your home was caused by a wildfire. Though it’s generally nontoxic, ash can irritate your skin and cause respiratory problems, so be sure to avoid contact as much as possible and always wear a mask when cleaning it up. If it does come into contact with your skin, wash it off immediately.
Start by clearing your roof and gutters of any ash. To clean it properly, do what you can to avoid dispersing it into the air. Gently sweep it into plastic bags, paying special attention to corners and ledges prone to build-up. If you have a chimney, inspect and clean it as closely as possible, but if it seems particularly affected you’ll want to call in a professional to thoroughly clean it. Piles of ash can be thrown into the regular garbage — consider double-bagging to avoid dust clouds — but avoid washing it down storm drains.
Once the top of your home is clear, work your way down to the walls and windows to get rid of any soot, ash, or smoke staining. If there were no chemical fire retardants used in your area, you can use a garden hose to rinse them off, or in more extreme cases a power washer. Be sure to absorb the water runoff as much as possible to avoid creating potentially toxic puddles. Windows can be finished off with glass cleaner.
For porches, walkways, and exterior stairwells, a gentle sweeping followed by wet mopping is usually enough to clean away ash and soot. For the driveway, sweep up as much as you can before rinsing the area with water. If you have trouble removing ash from your yard, lightly water it with a garden hose for about a week to help it recede into the ground.
Interior Clean-Up
When you’re ready to move inside, do so with extreme caution. Open all doors carefully and never force them ajar; the doorway could be supporting the building’s (now precarious) structure, and shifting its position could lead to injury, further damage, or even a collapse. Find an alternate entry to the front door if necessary, and consult a building inspector or fire marshal before entering any interior rooms with a jammed door.
Once you’re inside, stop and sniff for a gas leak. If you even think you detect the odor, or if you hear a suspicious hissing sound that could be a broken gas line, leave the house immediately and call the fire department. Follow their instructions implicitly and be sure to let your neighbors know what’s going on so they can take the necessary precautions.
As you begin your interior inspection, don’t forget to look up; the ceiling may be unstable or show signs of sagging from water collection. Similarly, the walls and flooring may have been weakened from fire or water damage, so step lightly and test any areas that look questionable before putting your own weight on them. You can use thick plywood panels or wood boards to cover unstable areas, just be sure they extend at least 8-12 inches on each side of the damaged area.
Use fans and open windows to increase the circulation of air throughout the home. If there’s a great amount of water damage and you live in a warm, humid climate, it may be better to keep the windows shut and instead opt for a dehumidifier. In cold weather, the heating system can help remove humidity from the air — just don’t forget to check and clean the filter each day.
Dry any wet items like drapes, carpet, and furniture as soon as possible to avoid permanent mold and mildew damage. Aluminum foil or plastic wrap can be placed under furniture legs for protection, and any fully-dried items can be enclosed in plastic until all cleanup is completed. You’ll need to completely remove large area rugs for proper drying, especially those that extend wall-to-wall.
Before you can start working on ridding your house and belongings of smoke odor, you’ll first need to address any soot. Soot is quite oily, meaning it’s easily transferred among items and prone to staining. You may be able to remove it yourself by taking the vacuum hose and holding it slightly off the surface of the item or area. Never use an upright vacuum or brush tools when removing soot, as that can cause the soot to grind deeper into fabric and carpet. You may even want to hire a professional carpet cleaner to remove the soot with a professional grade heavy-duty shop vacuum designed for these purposes.
To remove soot from walls, use a chemical sponge or another non-water based cleaner. (Be especially careful with plaster walls — water-based cleaners can actually cause the soot to bleed into the wall.) You may have success using paint thinner or rubbing alcohol, though you’ll want to ensure the room you’re working in has adequate ventilation before you begin.
Removing smoke odor from fabrics can be a tricky process, but the good news is that you have several options for treatment. For clothing, it may help to add 1-2 cups of vinegar to each wash load, though it may take several cycles to completely remove it. For persistent smells, try dissolving one cup of dishwasher detergent with one gallon of warm water and soaking the items overnight. Wash them as usual the next day. Never attempt to counter the smell with fabric refreshers or perfumes — at best, it will only mask the smell temporarily, and it could even amplify the problem.
For clothing that can be bleached, try mixing 4-6 tablespoons of trisodium phosphate (which can usually be found at your local hardware store), one cup of household chlorine bleach, and one gallon of water. Swish around the clothes and work the mixture through the fabric as much as possible, then rinse them with clean water.
When it comes to furniture and other items unable to be thrown in the wash, consult your local dry cleaner on which counteractants would be best to use; he may have several recommendations based on which items were affected, so be sure to tell him the kinds of materials you’ll be treating. He may even be able to suggest items for your laundry if you’re still having trouble removing the odor from clothing.
A major problem with smoke odor is that it can travel quite easily, including through walls and air ducts. Unfortunately, this means it can get trapped in air ducts and cause a recurring odor even months after the fire. Your best option to ensure your entire house gets aired out properly is to consult a professional about thermal fogging, a process that opens the pores of walls and neutralizes the smoke odor. It’s especially helpful in homes with attics, though you’ll likely need to remove odor-absorbing insulation from the attic either way.
While there are plenty of ways to clean up your home and property yourself, keep in mind that bringing in a professional may be the best route for certain tasks. While costly, these experts will know the best ways to get your home back to its pre-fire condition; plus, the expense will likely be significantly less than having to replace items after failed attempts to refurbish them yourself. Keep detailed records and receipts for both you and the insurance company; some of the repairs may be tax-deductible.
The fire recovery process comes with plenty of challenges and frustrations, so be sure you have a strong support system to help you through it. You may even discover that the cleanup process helps your family come together as one and bond, so look for silver linings as often as you can. With time, your home will look more like you remember it — perhaps even better! — and with patience, your emotional wounds will heal, as well.


 United States
 Canada